INSTALLATION
Determine the correct installation location
Product overview
The Discovery 911 Smoke detector is an advanced device designed to ensure your safety by providing quick firefighting assistance in the event of a fire-related emergency.
The smoke detector uses a network of fire response vehicles to respond to emergencies. In the event a fire occurs, the smoke detector will sound an alarm and notify you through the Discovery Insure app. You can confirm if it is a real emergency, and if so, our emergency response team will alert fire response services.
Getting started
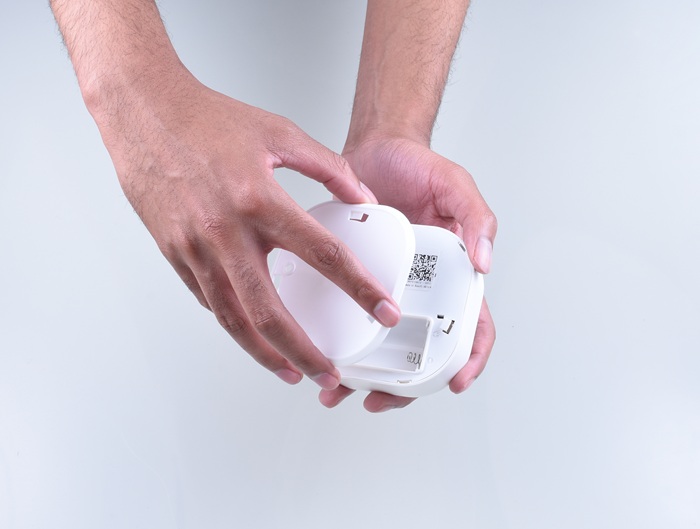
1. Turn the cover to the left to open the device.
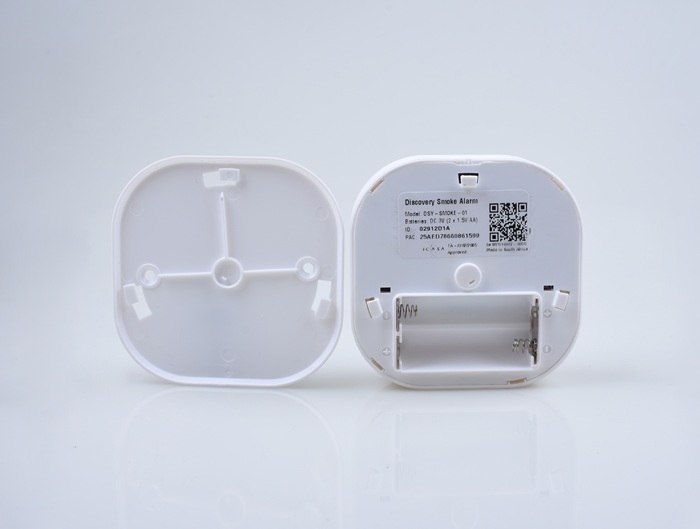
2. Place two AA alkaline batteries in the smoke detector.
3. Log in to your Discovery Insure app. (Download it here if you don't have it.)


4. Locate your order in the app under the Devices to set up section.
Warning: Only use regular alkaline batteries. Do not use rechargeable or lithium batteries.
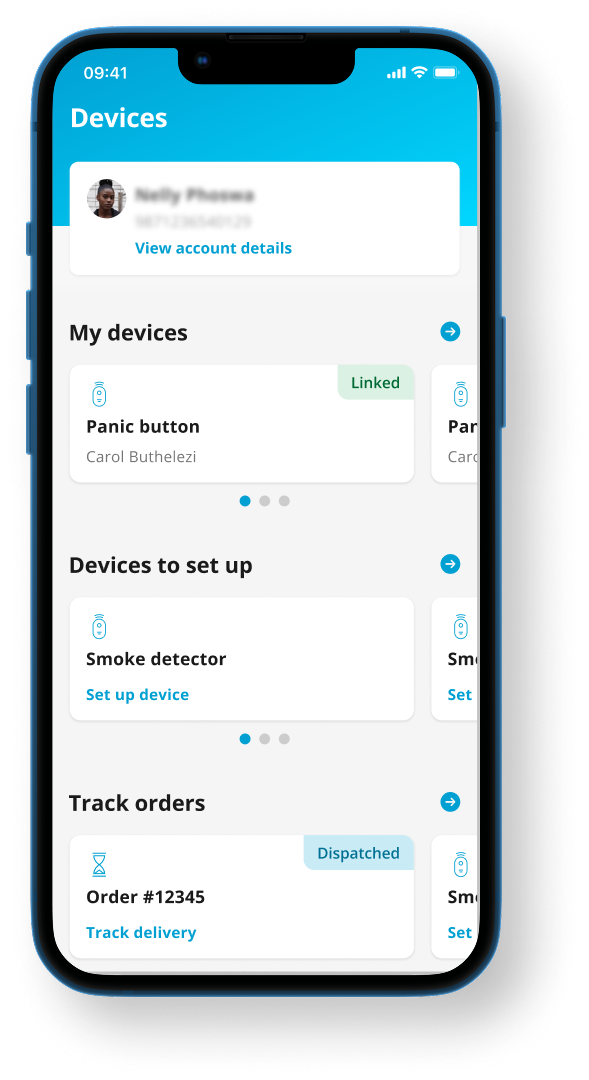
5. Tap on the Smoke detector option and follow the in-app setup prompts.
6. For guidance on where to place the device, refer to the placement guidelines below once you reach that step in the app.
Battery life and low-battery warnings
- Low-battery alerts: If the smoke detector's batteries run low, you will receive:
- An SMS
- Push notification in the Discovery Insure app
- An in-app message in the Discovery Insure app. In addition, the device will emit an audible beep every 43 seconds. Please replace the batteries as soon as any low-battery warning is received.
- Standard alkaline AA batteries used in smoke detectors last on average about 6-12 months in normal household service.
- Replace the batteries immediately when you receive any low-battery alert.
Room selection
- Install in rooms most likely to have a fire:
- Kitchen
- Rooms with inverter batteries
- Indoor braai area
- Do not install in an outdoor or open area.
Placement guidelines
- Ceiling placement
- Install smoke detectors on the ceiling, preferably in the centre of the room.
- Maintain a minimum distance of 30 cm from the nearest wall.
- Avoid placing detectors directly above light fittings, air-conditioning vents or ceiling fan blades.
- Do not install directly above cooking appliances.
- Wall placement
- If mounting on a wall, maintain a distance of 30 cm from the nearest corner.
- Do not place the detector within 40 cm of an air-conditioning vent or ceiling fan blades.
- Position the detector between 10 cm and 30 cm below the ceiling.
- Vertical distance
- The smoke detector should be positioned at no more than 60 cm vertically below the highest point in the room.
Installation using double-sided tape

- Determine the correct installation location.
- Confirm that the surface is smooth. If it is not, install the device using self-expanding screw anchors.
- Clean the area you plan to install the device on with a wet cloth. Allow it to dry fully.
- Remove the mounting plate (back plate) by twisting it off the smoke detector. Remove one side of the double-sided tape and apply it to the smoke detector's mounting plate.
- Remove the other side of the double-sided tape and stick the mounting plate onto the desired position.
- Twist the smoke detector clockwise onto the back plate, making sure that the plastic hooks on the detector and mounting plate align.
Installation using self-expanding screw anchors
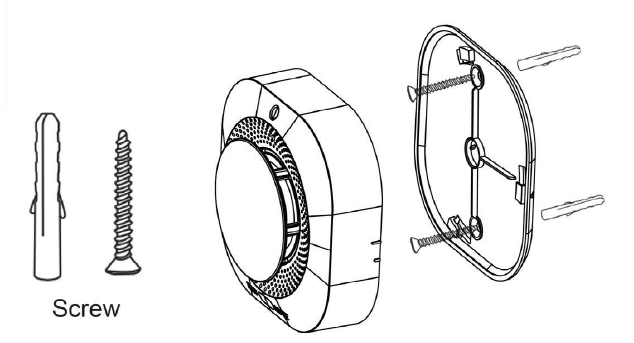
- Determine the correct installation location.
- Remove the mounting plate (back plate) by twisting it off the smoke detector. Place the mounting plate on the desired location.
Mark the hole positions with a pencil. - Drill holes with a masonry drill bit if mounting on concrete. If mounting on a regular ceiling, screw only the screws (without self-expanding plastic) into the ceiling while holding the mounting plate in place.
- Put two AA alkaline batteries into the smoke detector.
- Twist the smoke detector back onto the back plate, making sure that the plastic hooks on the detector and mounting plate align.
Discovery Telematic Services (Pty) Ltd is a licensed security business under the Private Security Industry Regulation Act, incorporated in South Africa with limited liability. Registration number: 2019/585012/07. Product rules, terms and conditions apply. www.discovery.co.za, or you can call 0860 751 751.